
The last step was to thin both ends with a file so the attached parts would seat properly. Note that both ends on the arc are straight.
Back to the index page
See the index page for other related projects.
Bracket for flash macrophotography
Introduction
Some time ago I decided I desperately needed a macro flash bracket. The
idea was to get something I could put my
Olympus T-28 twin flash on and
adjust the flash heads a bit more than the original OM lens ring allows you to
do. I started looking around at what is available and found a few that I liked.
One that I was especially attracted to was the
Wimberley®
flash
bracket. It is modular in design, very flexible and can be used in almost
any situation. Clearly a superb design and high quality. But you get what you
pay for, and when I saw what they charge for it I almost fainted. I knew that my
very understanding wife would never accept me spending hundreds of dollars on
some "metal thing", so I had to look for something else. In my quest I
found
many homemade brackets, some flimsy, but some which I liked. Slowly I
came to the conclusion that if these people could make their own flash bracket,
I should too.
The original basic idea was based on Wimberley´s design, some piece of aluminum
which would be fastened to the 1/4" tripod hole under the camera and would
somehow arc around the lens, or fastened to a tripod collar, is
what I started with. I don't claim to have invented the wheel, later I
found this page clearly
showing that someone else
had this idea before me. I had no idea what I was getting into. I
have very little experience with metal fabrication, but I was sure I could
figure this out given enough time.
The original idea was to make a flexible bracket just for my T-28, but when I started to
think about it, I saw that I could add a bit to the functionality without too
much hassle. I could easily also use it for my FL-50 flash (separately or both at
the same time) and also have the option of fastening a small reflector to it.
I also wanted to put the flash heads on goosenecks so they could be moved freely
around.
Please note
Before I go any further guess this is necessary: I can not be held
responsible for any injury caused to you or anyone trying to
follow my guidelines, or for any damage caused to your equipment. Also, all original
ideas in this design are mine, you are free to copy this or modify for your own
private use only - and if you find this helpful I would really love to
hear from you. Commercial reproduction based
on my original design is not permitted.
Finding the material
The first thing was to find the appropriate material. I wanted to use
1" flat aluminum for most of the construction, but I did not like the
aluminum
available in the hardware stores around me. It was either too thin or
thick, so in the end I purchased it from
MetalsDepot.com (see list below). Finding the right goosenecks was
trickier. The ones I found were either too heavy and long or just too
expensive. Finally I came across something called
Loc-line®. It is actually
a flexible water hose constructed out of "beads" and does thus fit
my "modular" idea perfectly. I later found out that this is actually the
same product Wimberley uses - which gave me some additional ideas, see below.
Other things I needed were knobs/screws to put it all together and shoes for the
power unit and the flash heads.
The making
Simple, just bending, cutting with a hack saw, filing, drilling
and cutting threads with an 1/4" tap. Grinding machine screws with Dremel
And then time. Lot of time.
Material:
3/16" x 1" x 2' (x2) flat aluminum (MetalsDepot.com)
1/8" x 1/2" x 2' flat aluminum (MetalsDepot.com)
1/8" x 1-1/2" x 1" x 2'
angle aluminum (MetalsDepot.com)
1' of Loc-line (can be found at Modular Hose or just buy the Wimberley 1"
extension for about the same price at B&H)
1/4"-20 machine screws
1/4"-20 thumb screws
1/4"-20 knobs (had those but can be found at hardware
stores)
flash shoes (I already had them but they
should be found at stores like B&H
or Adorama)
epoxy glue (hardware store)
Dupli-Color Self-Etching Primer® (if you want to paint the bracket, got it from
my local Pep Boys)
Hakuba HCS25 flash head (Adorama)
Tools:
files
3/16" 3/32"
and 1/16" drill bits
1/4" tap for cutting threads
hack saw
small clamps
Dremel® (not necessary but helpful)
Cost:
I guess the total basic material cost was around $20-30.
I did not keep the receipts and the
whole thing was almost three months in the making - I did not have much time, so
this was done in small steps once I had figured out how to approach the next
step. Now as I know how, it would perhaps take around one
and a half day to do the whole thing - with hand tools. It would take you
much shorter time if you had some previous experience and access to a good metal
workshop.
|
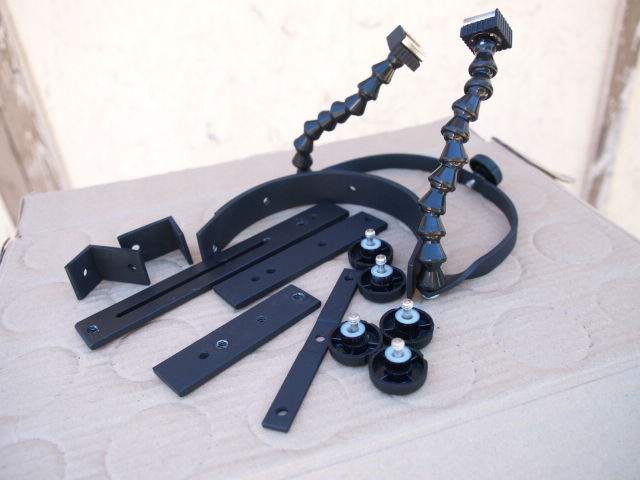
|
I used three different kinds of aluminum for the bracket. Most of it is made out of 3/16" x 1" flats. The parts where the goosenecks are attached to are made out of 1/8" x 1/2" flats, and the fasteners for reflectors/FL-50/Power Unit etc. are made out of 1/8" x 1-1/2" x 1" angle. |
|
|
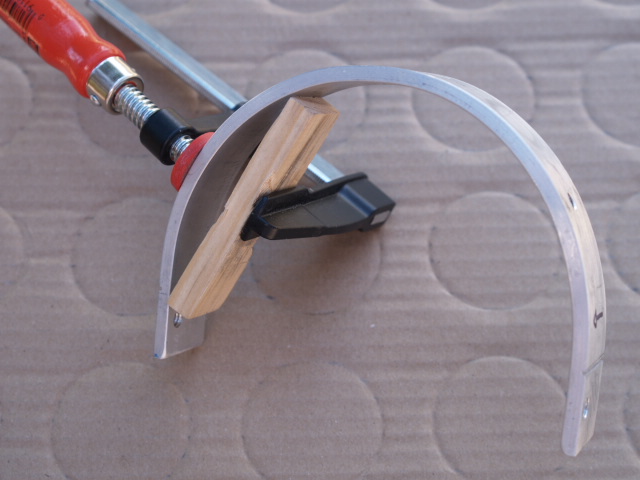
Bending the arc was the first step and the one
I was not sure if I could do properly. I began by bending it about 40° in
the middle and half way from the middle in both directions, by pushing it
against a grape fruit tree (that is the only tree I have tried and can thus
recommend, use any other species at your own risk!) and then slowly curving
it into the desired shape by using clamps as shown. It worked very well, but
you should not try to do this in a hurry if this is your first time working
with aluminum. I then drilled four holes with 3/16" drill bit and finally cut 1/4"-20 threads (holes at both ends
and at "1.30" and "3 o'clock". The two holes drilled through the middle of
the arc are to fasten reflectors, the flash power unit, battery pack for
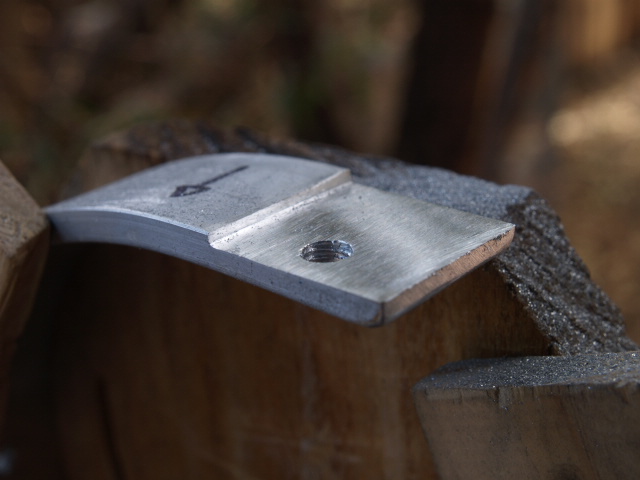
modeling lights or whatever I might want to fasten there. The last step was to thin both ends with a file so the attached parts would seat properly. Note that both ends on the arc are straight. |
|
|
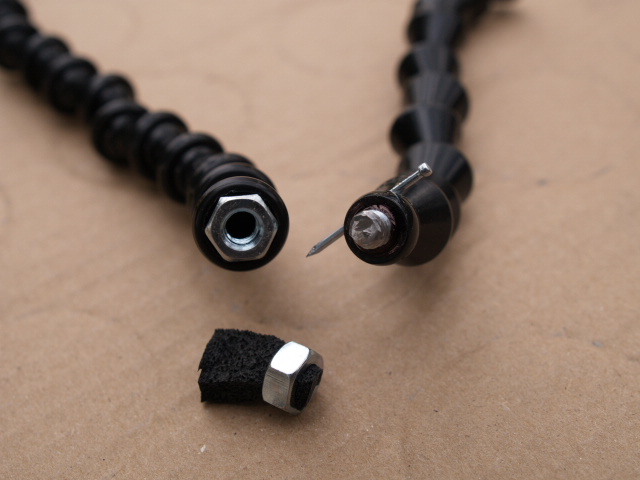
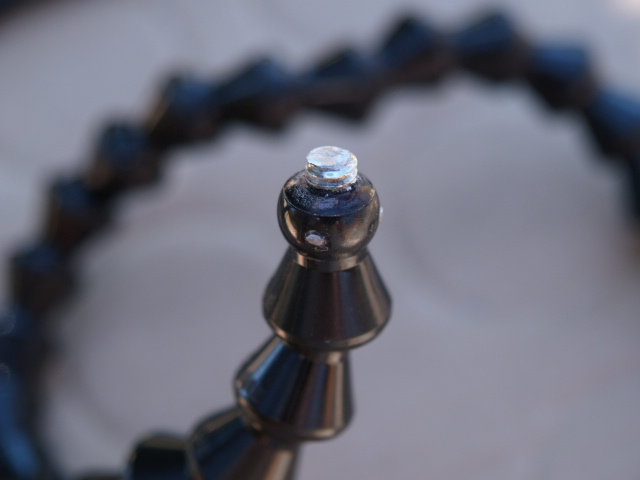
The only real problem I had was with the goosenecks. The idea was to fasten the beads by somehow gluing an 1/4" nut to the wider end and 1/4" screw to the other with epoxy (head cut away so it can be inserted). I used some foamy material I had at hand to fill up the nuts and to close the beads so the epoxy would not get into places where it was not supposed to go. That worked very well. But after it had hardened I realized that the epoxy did not bond properly to the Loc-line plastic, so the screws would come loose and turn when I was fastening the flash shoes to them. I thus ended up drilling through the beads with an 1/16" drill bit and putting a small nail through them to lock everything in place (nail shown before ends cut off and after it was cut on the lower image). If I do this again I would place the nail in there before pouring the epoxy in (epoxy is, as we know, the stuff that holds the world together, no project is over until epoxy has been applied somewhere). I then used lock washers to ensure that the flash shoes would be seating properly. |
|
|
Here are all the parts of the bracket after painting. I used a special etching primer (see above) prior to applying the color coat. If you fail to use a appropriate primer, you risk that the paint coat will not bite properly to the metal. You also have to clean all surfaces before applying the primer. I used rubbing alcohol to get all oil residues off. The straight pieces are of various lenghts to accomodate different lens lengths. |
|
|
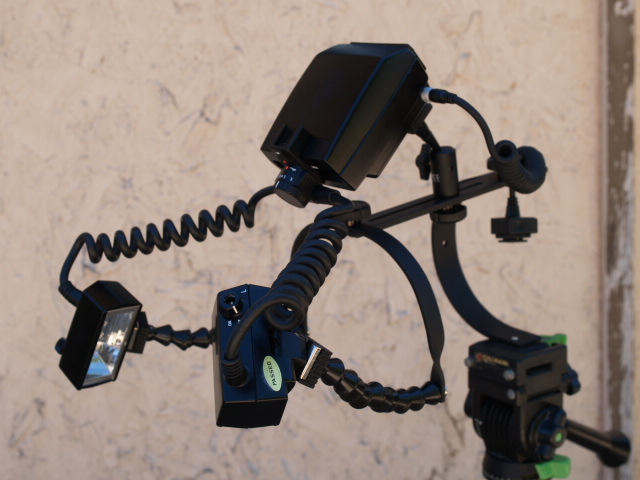
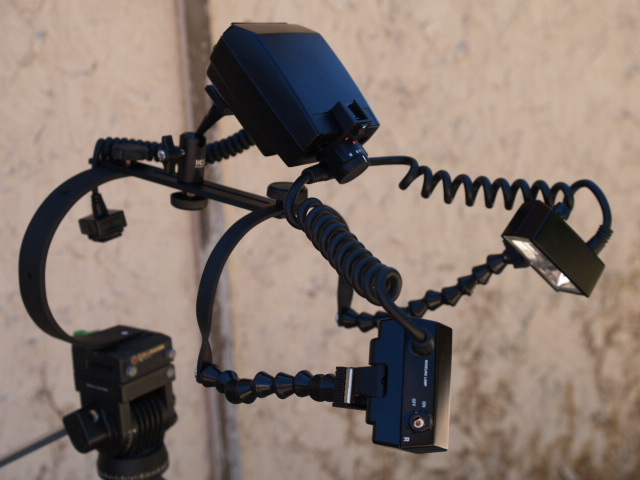
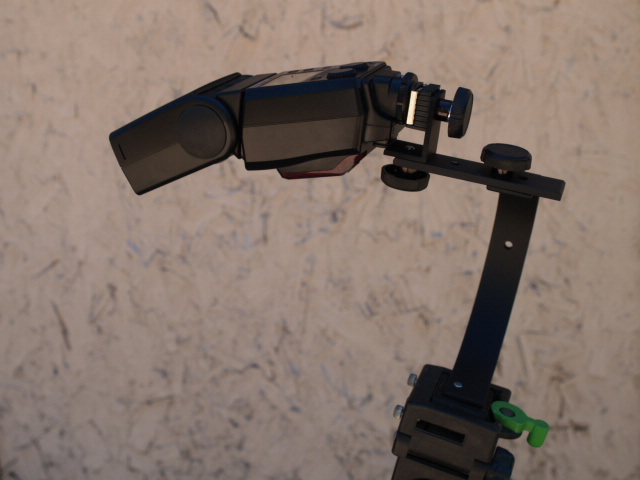
The bracket with the T-28 twin flash attached. If you place the power unit on the camera, then the coiled cords are too short when you u se longer lenses or extension tubes. I did not want to damage the cords by extending them, so my solution was to buy an extra flash shoe (Hakuba, see above) so I could place the power unit as close to the front as possible, and point it into any direction in order to mnimize any strain on the cords. |
|
|
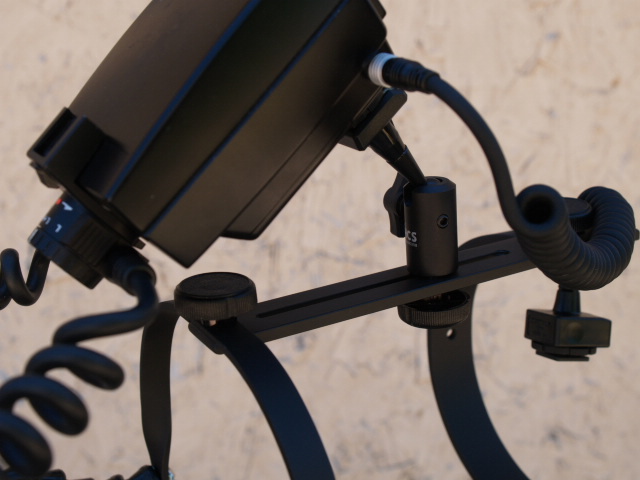
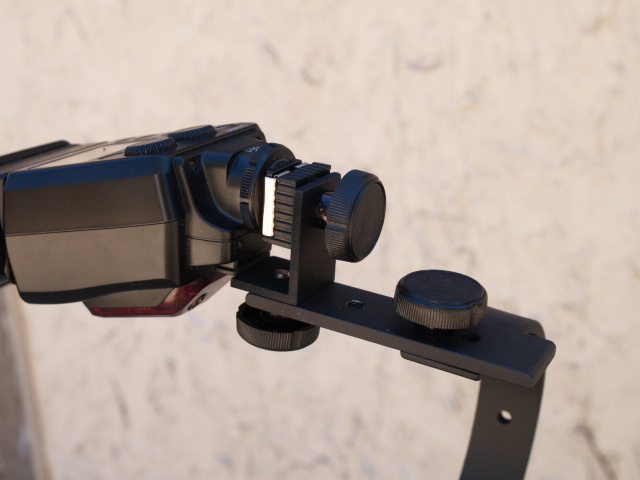
Close up showing the Hakuba flash shoe. Note the slit in the aluminum. I cut it so I could move the power unit back and forth as needed. |
|
|
The angle parts are intended to use with the FL-50 flash or any other things which must be attached to the bracket. |
|
Back to the index page |
©2007 Johann Thorsson